-
 Getting started
-
 FAQ
FAQ
-
 Group buying
-
 Settings
-
 Social
-
 Deals
Deals
-
 Promotion
-
 Payment
-
 Mobile apps
-
 Security
-
 Look & Feel
-
 Useful guides
Setting up Google API Project
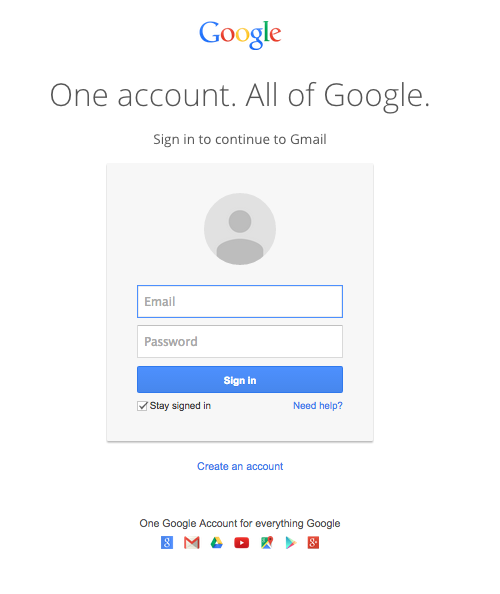
To give your website visitors an ability to sign in to your site using their Gmail (Google Mail) account, it is needed to set up Google API Project.
Please follow this step-by-step guide to set up the project correctly.
- Login to Gmail using your own account or register a new one.
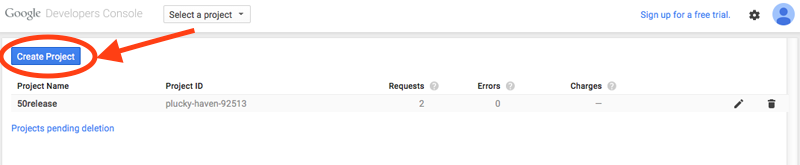
- When logged in go to Google Developers Console where you will be setting your API project https://console.developers.google.com/project
- At Projects page, click Create Project button.
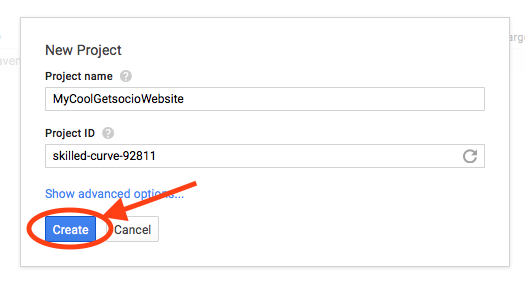
- The pop-up New Project will appear. You should type relevant Project name, you can also change automatically generated Project ID if preferred. Click Create button when you are done.
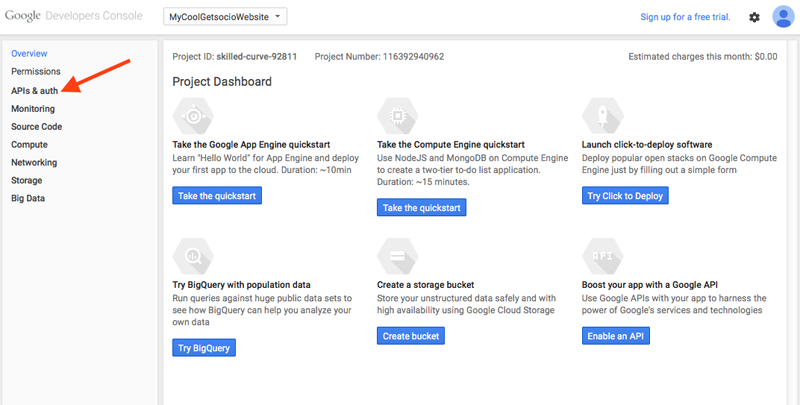
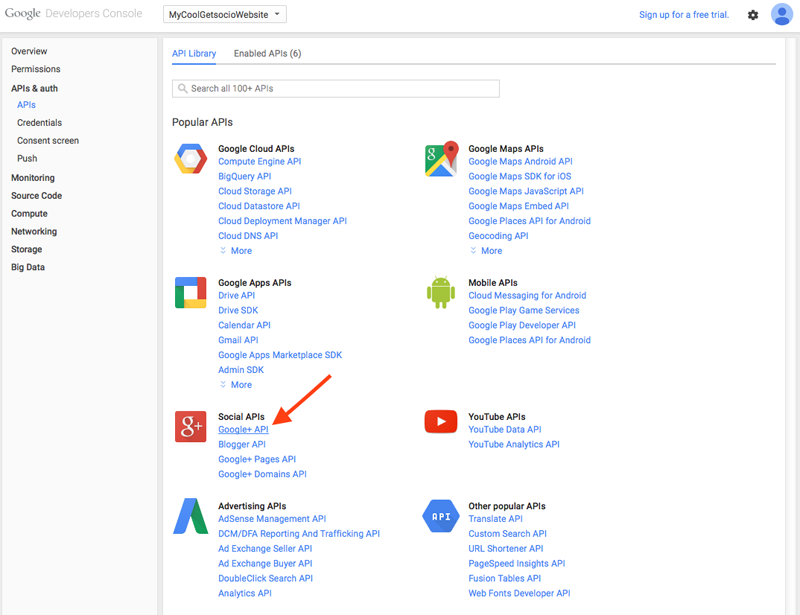
- On the next screen you will see your newly created project's dashboard. Go to APIs & auth -> APIs page in menu on the left.
- In the list of available APIs you need to select Google+ API in Social APIs menu.
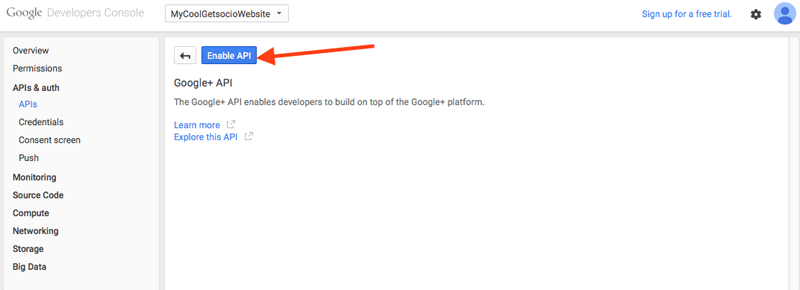
- Google+ API setting window will appear. Click Enable API button.
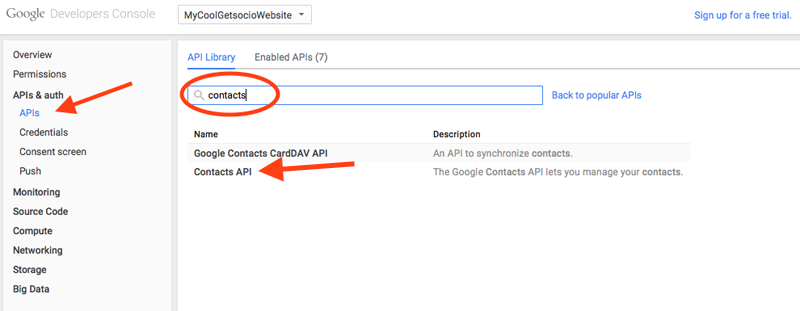
- When enabled, go back to the APIs list in the left menu and use Search field at the top of this page. You should be looking for Contacts API. Type "contacts" in a search field and choose Contacts API from the prompted list.
- Now click Enable API button at Contacts API window.
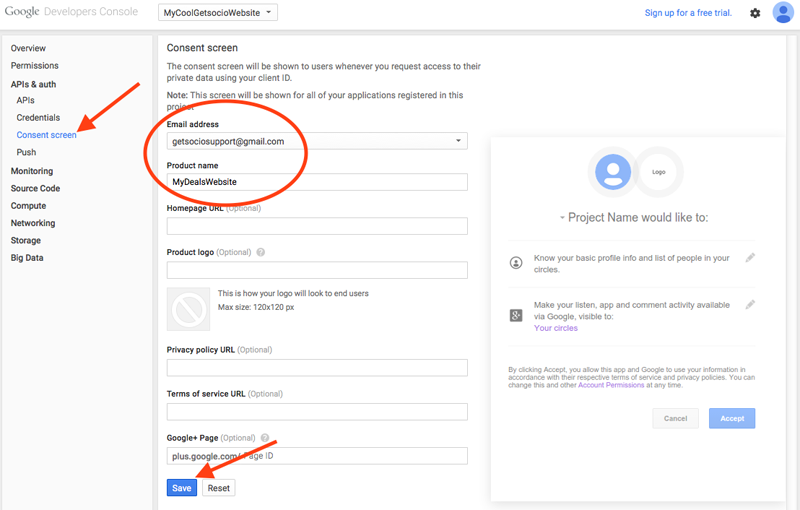
- After it's been enabled go to Consent screen page in the menu on the left. On this page you would need to set up Email address and Product name. When you are done, click Save button.
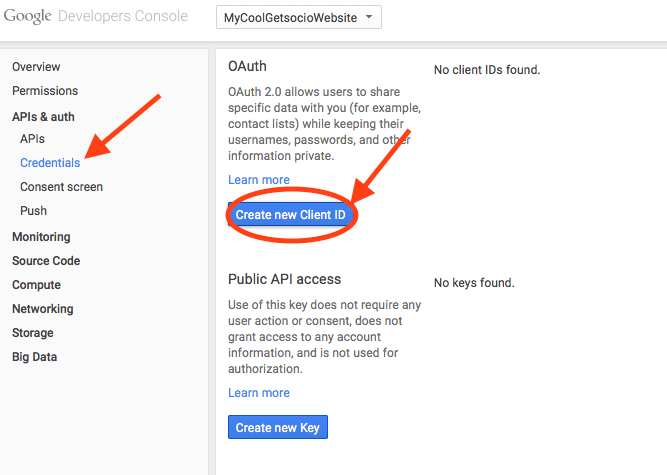
- On the next setup step you would need to generate credentials for this API Project. Go to Credentials page in the menu on the left and click Create new Client ID button.
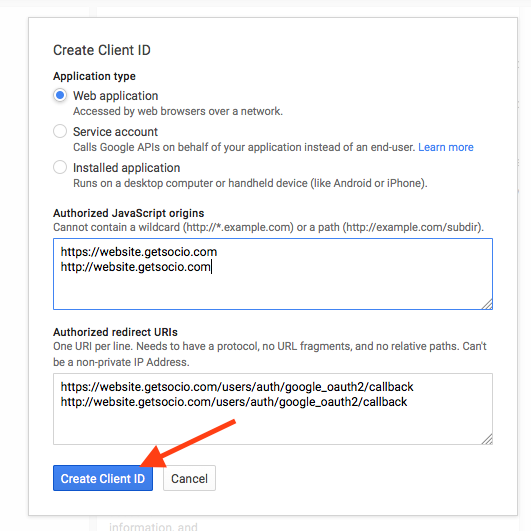
- Create Client ID pop-up will appear. On this pop-up you will need to select and enter the following:
- Application type – Web application
-
Authorized JavaScript origins – links to your site with http and https connection:
https://yourdomain.com
http://yourdomain.com -
Authorized redirect URIs – special URLs needed for the proper login, again with http and https connection:
https://yourdomain.com/users/auth/google_oauth2/callback
http://yourdomain.com/users/auth/google_oauth2/callback
Note: it is essential to set up these values correctly. Please copy the lines above, paste them to the Google Client ID settings and only replace yourdomain.com with your website's actual domain name. Double check that you entered correct values with http and https protocol.
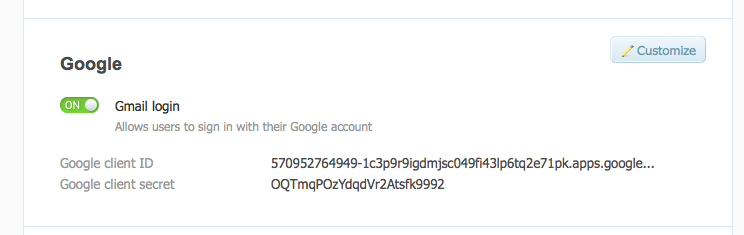
When all is entered correctly, click Create Client ID button. - The project is now fully setup. Now it is needed to paste generated values to your site settings. Copy values of Client ID and Client Secret fields, then go to your website -> Admin section -> Settings page -> Social login tab -> Customize in Google section and paste relevant values to the Google client ID and Google client secret fields. Do not forget to save the changes.
- Next enable option Gmail login for visitors to be able to login to your site with Google Mail e-mail addresses.
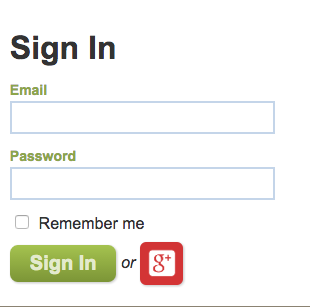
- It is all done. You should now make sure that it works correctly by simply logging to your site with your Gmail account.