-
 Getting started
-
 FAQ
FAQ
-
 Group buying
-
 Settings
-
 Social
-
 Deals
Deals
-
 Promotion
-
 Payment
-
 Mobile apps
-
 Security
-
 Look & Feel
-
 Useful guides
Categories
This tool allows you to target deals to a certain audience based on customers preferences. It will be especially helpful for you if you plan to post deals of many types and sorts, as it groups the deals for users and helps not to get lost in the variety of deals.
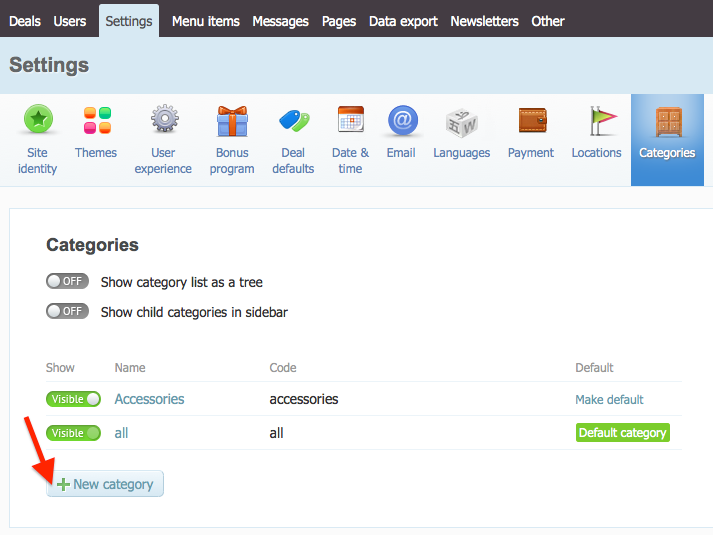
By default for newly created website there is one category – "all". If needed you can add more categories later.
If you plan to offer deals of some other kinds, you may visit Categories tab in Settings page of Admin section and click New category button to add category.
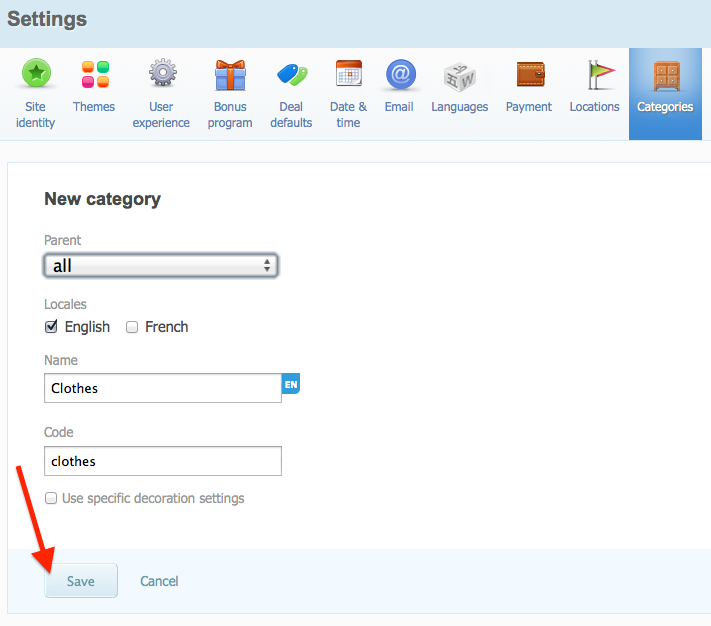
On the next screen you should type a name for this category, choose the parent* one for it (can be left blank if no parent category). Also you should type a category code (the part of the URL that will be after yourwebsite.getsocio.com/). If the category name is a single word – then just type it to the field in lower case, if it contains couple of words – the best would be to divide the words with hyphen - .
*How does the parent-child relation work? For example you plan to add a new category – "Accessories". Then, when creating this category you should set the existing "all" as a parent to "Accessories", because "all" is meant to combine all other categories created. Similarly you may add more categories: "Electronic devices", "Furniture", "Health and Beauty" etc. and set "all" as parent to them. This hierarchy is not limited with one level, you may make it of several levels (for example, category "Sunglasses" and "Scarfs" can be child to "Accessories", etc.)
Such relations will help to display deals well-structured: deals from "Accessories" will be shown in "all" and vice versa – deals from "all" will be shown in "Electronic devices", "Furniture", "Health and Beauty" etc. Same way the subscription works – subscribers also receive deals from parent/child of the category they subscribed for.
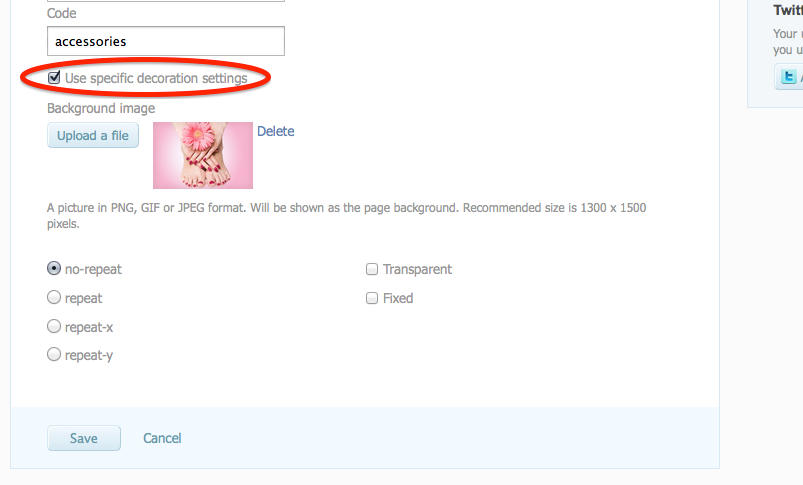
It is possible to upload different background image for a certain category. Check the box Use specific decoration settings and press Upload a file to upload an image from your computer. There also you can find a few options to customize the uploaded image, their description can be seen in themes guide.
Do not forget to save your changes when you are done.
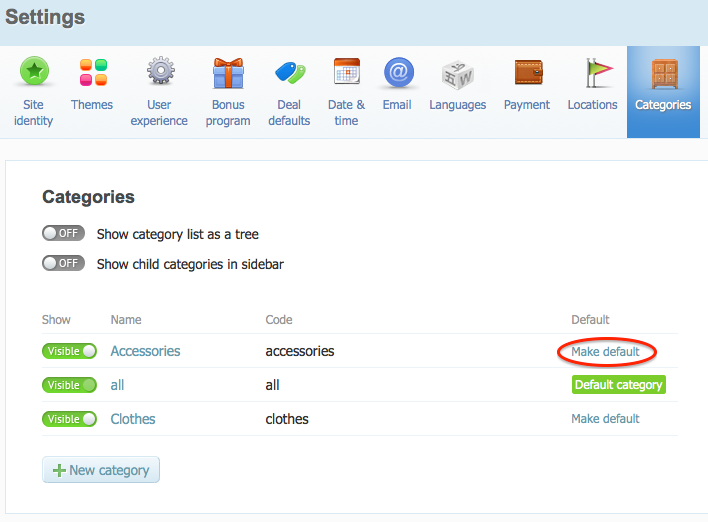
The default category is the landing one for all new customers. After you created a few categories you may need to change it. It is easy to do this by clicking Make default on the preferred category under Categories tab of Settings page.
If you decide to pause deals of some sort, it is recommended to hide the relevant category, so people would not see it empty. Just toggle off Visible to hide it and then toggle back on when starting deals of that kind.
As you see it is easy to add categories, but you should make sure you will not spoil yourself and will not add lots of product types that you know. More than likely, you will use only one category – "all" and others will be left empty. Having lots of empty categories sends a very bad signal to your visitors, as they will probably leave your site disappointed even before they find the category with deals. That is why we suggest to start with one category and only add more after your site generates a steady amount of sales. Focus on one category, get deals, start selling, build a successful business, then consider categorizing your products.